
Table of Contents
- Why Lumbar Support Matters for Your Office Chair
- What You'll Need Before Adjusting Lumbar Support
- Step-by-Step Guide: How to Adjust Lumbar Support
- Signs of Poor Office Chair Posture and Incorrect Lumbar Support
- Creating an Ergonomic Chair Setup Guide
- How to Use a Lumbar Cushion as a Supplement
- DSE Assessment Chair Requirements and Compliance
- Common Mistakes to Avoid When Adjusting Lumbar Support
- Frequently Asked Questions
Last Updated: 11 October 2026
Why Lumbar Support Matters for Your Office Chair
Your lower back carries the weight of your entire upper body when you sit. Without proper support, your spine rounds forward, putting strain on the discs and muscles. This is where adjust lumbar support becomes essential.

Lumbar support holds your spine in its natural curve. When positioned correctly, it reduces pressure on your lower back and keeps you comfortable for hours.
Most people sit in chairs that don't support them properly. Their backs ache by mid-afternoon. They shift constantly, trying to find relief. The fix is straightforward: learn to adjust lumbar support on your chair.
What You'll Need Before Adjusting Lumbar Support
Before you start adjusting, gather these items and check your setup:
- Your office chair with adjustment controls
- A mirror or phone camera to see your posture from the side
- A small notebook to record your settings
- 10 minutes of uninterrupted time
- Good lighting so you can see the adjustment mechanisms clearly
Most office chairs have lumbar adjustment controls on the side or back of the seat. Some use a dial. Others use a lever or sliding mechanism. Check your chair's manual if you're unsure where yours is located.

The key is having good visibility. You'll need to see both the adjustment control and your back's position. Natural light helps. If your office is dim, move your chair near a window or use a desk lamp.
Step-by-Step Guide: How to Adjust Lumbar Support
Step 1: Find Your Natural Lumbar Curve
Sit upright in your chair with your feet flat on the floor. Your knees should bend at roughly 90 degrees. Don't lean back or slouch forward, sit as if you're working at a desk.
Place your hand on your lower back, just above your hip bones. Feel the natural inward curve of your spine. This is your lumbar curve. Your chair's lumbar support should fill this space without pushing too hard.

Many people find their lumbar curve is higher than they expected. It's not at the very bottom of your back, it's roughly where your lower ribs end.
Step 2: Locate the Lumbar Adjustment Control
Now find your chair's adjustment mechanism. Most office chairs have one of these:
- Dial on the side: Turn it clockwise to increase support, anticlockwise to decrease
- Lever underneath: Pull up to increase support, push down to decrease
- Sliding bar: Move it up or down to adjust height and firmness
- Knob on the back: Twist to adjust the depth of the lumbar curve
Check your chair's manual if you're unsure. Many manufacturers print instructions on the control itself. If you can't find the manual, search the brand name and model number online.
Step 3: Position the Support Correctly
Start with the lumbar support at its minimum setting. Sit back in the chair and relax into it for 30 seconds. Then slowly increase the support.
Adjust in small increments. Turn the dial a quarter turn. Move the lever slightly. Give yourself 10-15 seconds to feel the change. Stop when the support feels snug against your lower back curve, not tight, not loose.
The support should feel like a gentle hand supporting your back, not a force pushing you forward. If you feel pressure or discomfort, you've gone too far. Back off slightly.
Step 4: Test and Fine-Tune
Sit in your adjusted chair for 20-30 minutes while doing normal work. Type, move your mouse, shift positions slightly. Notice how your back feels.
Common signs you've got it right:
- Your lower back feels supported but not pushed
- You're not thinking about your back, it feels neutral
- You can sit comfortably without slouching
- You don't feel pressure points or discomfort
If your back still aches after 30 minutes, adjust the support. Increase it slightly if you feel unsupported. Decrease it if you feel pressure.
Record your final setting. Write it down or take a photo of the dial position. This helps if someone else uses your chair, or if you need to adjust it again later.
Signs of Poor Office Chair Posture and Incorrect Lumbar Support
Poor posture and inadequate lumbar support create recognisable patterns. Knowing these signs helps you catch problems early.
Your back aches by mid-afternoon. This is the most common sign. Your lumbar support is either missing or positioned too low.
You lean forward constantly. If you're always hunching towards your desk, your chair's support isn't holding your spine in place.
You shift positions every few minutes. Restlessness signals discomfort. A properly supported back lets you stay still comfortably for hours.
Your shoulders round forward. This often happens when lumbar support is too weak. Your upper back collapses forward to compensate.
You feel pressure or numbness in your legs. Poor lumbar support can tilt your pelvis, cutting off circulation to your thighs and legs.
Your neck and shoulders tense up. When your lower back isn't supported, your neck compensates by tensing. This creates a chain reaction of tension up your spine.
If you notice any of these signs, adjust lumbar support immediately. Don't wait for pain to worsen. Early adjustment prevents chronic problems.
Creating an Ergonomic Chair Setup Guide
Lumbar support is just one piece of the puzzle. A fully ergonomic setup includes several elements working together.
Seat height: Your feet should rest flat on the floor with your knees at 90 degrees. If your feet dangle, raise the seat. If your knees are higher than your hips, lower it.
Armrests: Set them so your elbows bend at 90 degrees when your arms rest on them. Your shoulders should stay relaxed, not hunched up.
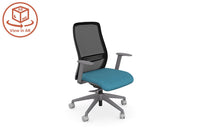
Operator Office Chair Mesh Back in Black X.66 →
Desk height: Your elbows should rest at desk level when your arms hang naturally. Your wrists should stay straight, not bent up or down.
Monitor position: Place your screen at arm's length away, with the top of the screen at or slightly below eye level. This prevents neck strain.
Lumbar support: As covered above, position it to match your natural spine curve.
When all these elements align, your body stays in a neutral position. Neutral posture uses the least muscle effort and causes the least strain.
The Operator Office Chair from THATSMYOFFICE includes adjustable lumbar support specifically designed for this. The Operator Office Chair Mesh Back in Black X.66 offers multiple adjustment features so you can dial in your perfect setup.
How to Use a Lumbar Cushion as a Supplement
Sometimes a chair's built-in lumbar support isn't enough. A lumbar cushion can bridge the gap.
Lumbar cushions are portable, removable supports that sit between your back and the chair. They're useful if:
- Your chair's lumbar support is fixed and doesn't match your curve
- You sit in multiple chairs throughout the day
- You're using a chair that has no lumbar support at all
- You need extra support during particularly long work days
How to position a lumbar cushion:
- Sit upright in your chair with your feet flat
- Place the cushion at your natural lumbar curve, just above your hip bones
- Lean back slightly so the cushion supports your lower back
- Adjust its height or angle until it feels comfortable
- Secure it with the straps if your cushion has them
A good lumbar cushion should fill the gap between your back and the chair without creating pressure points. You should feel supported, not squeezed.
When using a lumbar cushion alongside your chair's built-in support, start with the chair's support at a lower setting. Add the cushion's support gradually. Too much support from both sources can create discomfort.
DSE Assessment Chair Requirements and Compliance
In the UK, employers must comply with Display Screen Equipment (DSE) regulations (Working safely with display screen equipment). These rules cover workstations, including office chairs.
According to the Health and Safety Executive guidance on DSE workstations, office chairs must provide adequate support for the lower back. The regulations don't specify exact lumbar support measurements, but they require that chairs support the natural curve of the spine.
Your chair should allow you to adjust lumbar support to match your individual needs. One-size-fits-all chairs that don't adjust don't meet DSE standards.
Employers must also provide DSE assessments for staff who use screens regularly (Working safely with display screen equipment). These assessments evaluate the entire workstation, including chair suitability. If your assessment identifies lumbar support as a problem, your employer should address it.
For procurement managers and facilities teams, this means selecting chairs with adjustable lumbar support. The investment in proper chairs reduces back pain complaints and improves compliance.
Common Mistakes to Avoid When Adjusting Lumbar Support
Learning to adjust lumbar support correctly takes practice. Most people make these mistakes:
Setting it too high. The lumbar curve isn't at the bottom of your back, it's higher up. If your support is too low, it won't help. If it's too high, it creates pressure.
Cranking it to maximum. More support isn't always better. Maximum lumbar support often feels uncomfortable and restrictive. Start low and increase gradually.
Never adjusting it. Many people set their lumbar support once and forget about it. Your needs change as you age, gain or lose weight, or develop new work habits.
Ignoring pain signals. If adjustment causes pain, stop immediately. Pain means something is wrong. Adjust in the opposite direction or consult your chair's manual.
Using it as a substitute for movement. Even perfect lumbar support doesn't replace regular movement. Stand up, stretch, and walk around every hour.
Expecting instant relief. Your back muscles have adapted to poor posture. Proper support takes 1-2 weeks to feel fully comfortable as your muscles adjust.
Forgetting about other adjustments. Lumbar support works best when combined with correct seat height, armrest height, and monitor position. Adjust the whole setup, not just the lumbar support.
Getting your lumbar support right is one of the fastest ways to reduce back pain and improve comfort at work.
Frequently Asked Questions
Where should lumbar support be positioned on an office chair?
Lumbar support should sit in the small of your back, roughly at the level of your natural lumbar curve (approximately 4-6 centimetres above your waistline when seated). The support should fill the gap between your lower spine and the backrest, maintaining the natural inward curve of your lower back. Positioning it too high or too low reduces its effectiveness and can cause discomfort during long work periods.
How do I know if my lumbar support is adjusted correctly?
Your lumbar support is correctly adjusted when you feel gentle, consistent pressure in your lower back without any sharp discomfort. You should be able to sit upright without straining, and your spine should feel supported in a neutral position. If you experience lower back pain, numbness, or feel pressure points after adjustment, the support may be too firm or positioned incorrectly. Test your adjustment during a full work day to ensure comfort over extended periods.
What types of lumbar support mechanisms are available?
Office chairs typically feature three lumbar support types: adjustable mechanisms with dials or levers that move the support up and down, fixed lumbar supports built into the backrest, and separate lumbar cushions that can be added to any chair. Adjustable mechanisms offer personalised positioning, whilst fixed supports work well for standard office use. The Operator Office Chair range from THATSMYOFFICE includes adjustable lumbar support with intuitive controls for precise customisation to your needs.
How often should I readjust my office chair settings?
Readjust your lumbar support settings whenever you change chairs, experience new discomfort, or if your work habits shift significantly. If you share a chair with colleagues, reset the adjustments before each use. Seasonal changes or adjustments to desk height may also require fine-tuning. Regular reassessment, roughly every 3-6 months, helps maintain optimal support as your body's needs evolve and as chair materials naturally settle over time.









0 comments